Integrating art into the other
subjects in the
classroom is one way teachers are addressing the lack of art in the classroom.
The following art projects are just a few examples of how this can be done effectively.
Chinese Landscape Painting
This project blends art with cultural and geographical history.
Materials Needed:
2 Sheets of White
Construction Paper
l Sheet of a Larger
Black Piece of Construction Paper for Frame
Stick of Charcoal
Paper Towel
Glue
Black Tempera Paint
Red Tempera Paint
Brush
Toothbrush
Chinese Landscape
Painting
Onto a sheet of white
construction paper, starting at the edge of the middle of the paper, draw large
curving mountains and valleys with your charcoal horizontally across the paper.
At the bottom of the paper, draw rolling hills all across the bottom
horizontally. Now tear the contours of the black lines you have drawn with
your hand. That's right "cut" your mountains and rolling hills with your
hand. Now turn it over, so that the clean part faces you, and glue it to
the other sheet of construction paper. Glue it back where it would have
fit originally. Next, with vertical strokes, sweeping upward, draw
sweeping lines all along the curving mountains, and rolling hills. Using your
paper towel, blend the charcoal, creating atmospheric smoke onto your landscape.
Now take the brush and create Chinese characters and strokes. Finish it
off with a special Chinese "stamp" of your own unique signature. Chinese
artists often use their unique red stamp. Glue art work onto a black sheet
of construction paper and hang.


Greek Vases
(These vases integrate art with greek history)
It's not always possible to work with real clay or to fire ceramics.
Use air dry clay or buy pre-made terra cotta pots and decorate them with
symbols from the Greek culture. Use images posters or art images as
reference. Good for Olympic games time of year. Best for older
children.

African Tribe Symbol Hands
(Art & Symbols, Cultural Awareness, Reading, Speech &
Language Arts)
Trace children's hand onto white copy paper or construction paper using a
black crayon. Using African tribal symbols ask them to create a story
using the symbols. Symbols should be applied with crayon. Use a
dark watercolor wash over the crayon symbols to create a wax resistant art.
Children should share what they have created.
Adrinka Symbols of West Africa
http://www.welltempered.net/adinkra/htmls/adinkra_index.htm
Here you will find many symbols useful for this project and
others.
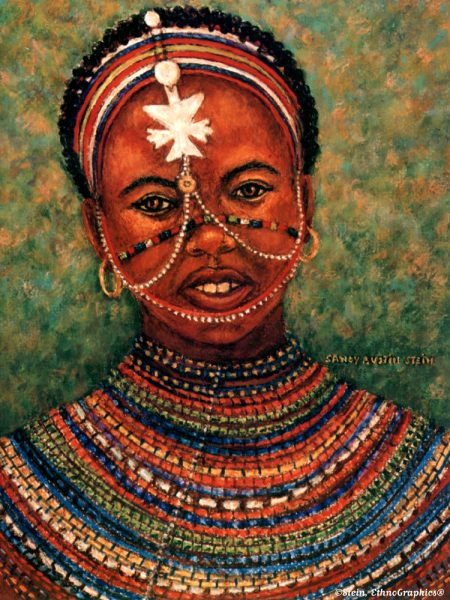
Sometimes detectives, artists, and others need a secret
language or code to communicate. In some African tribes young people
communicate with one another using beads. Each color of bead represents
certain characteristics and words. The beads are love letters to a close
friend.
Write a letter
using beads. Yes that's right! The Zulu's of
Nbebele tribe living in
Zimbabwe have used a color code to
send messages for a very long
time. The design, color, and
placement of the beads are an integral part
to the understanding
of the message and proverbs.
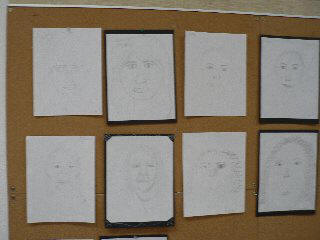
Drawing
Portraits
( Science, Math, Art)
Ask students to draw
the person seated next to them. Assure the students that it
doesn't matter what their drawing abilities are, the object of the exercise
is to have fun, learn to observe, and improve drawing skills. After
they have completed the exercise, ask them to include the name of the model,
their name, and the date of the exercise. Lay the drawings aside-these are
the "Before" drawings.
Tip: Students should
not spend too much time on this initial drawing nor use overuse the eraser.
Assure them they will have the opportunity to improve their drawing.
Ask the students to observe
their model once again. Ask them to draw an oval, and then to draw a
vertical line through the center of the oval. Instruct them to observe their
model. Notice that there is equal weight distribution on both sides of
the face. When they draw the features of the model, they will want to
be sure that the drawing is balanced.
Next, ask them to notice the
eye level of their model. Draw a line on their drawing that
corresponds to the placement of the eye level in their model. Ask the
students where the eye level is located. Many will respond "in the
middle of the oval". Ask them to really observe their model and they
will see that the placement is not quite l/2 but more than l/3. Draw
accordingly.
Now ask them to observe their
model again, and to indicate on their drawing where the nose of the model
would be placed, and draw a line to indicate it. It is about l/2 way
between the eye level and chine level of the model. The mouth is l/2
way between the nose and chin. Indicate this line.
Divide the eye level line
into 5 equal parts. Tell your students that you can place 1 eye
in-between the two and l on each side (spatially that is). Next draw
the pupils of the eyes, and the lines to form the eye sockets, and lids.
Ask your students to observe their modeled at the pupil. If they made
an imaginary line going from the pupil down the face, where would the line
"line-up" or end? At the corners of the mouth. Yes. Now
drop a line from the inside corner of the eye. Where does it end?
At the edge of the nose-Yes! Ask students to practice drawing the
eyes, ears, and mouths on the hand-outs.
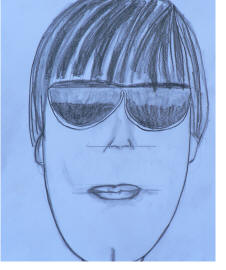
Now ask them to make a new
drawing using the new information. Use Q-tips to blend and tone
drawings. Encourage students to use short brisk lines for the facial
hairs such as the eyebrows and lashes. One of the common mistakes of
beginning portrait artists is that they make too many eyelashes. If
your model's eyes look more like spiders than human eyes it is a good
indication that you are overdoing the eyelashes.
Compare the Before drawings
to the After. Glue the After drawing to a black piece of construction
paper, or mat and hang in the classroom or school library.
Reference:
Drawing On The Right Side Of The
Brain by Edwards, Betty
ISBN:0006381146 Paperback
Grafton Books Harpercollins

Dream Boxes
(Art, Social Science, Goal Setting)
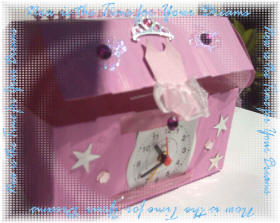
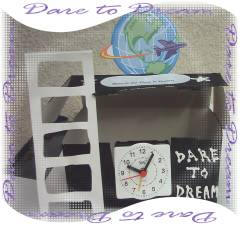
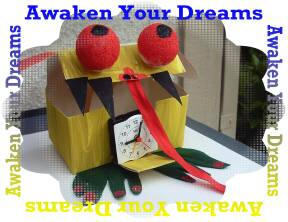
Dream Boxes are art projects that can be created with
sixth graders. You will need a box, variety of art materials, and a
battery operated clock or facsimile that you can glue into the box.
The idea is that we all have goals and dreams, but we don't realize how
quickly time goes by. Kids can place their dreams and goals into the
box on index cards and then on the back write a plan for accomplishing them.
Trip to France
(Art, Geography, Cultural History, Science)
Bon Voyage!!!  You are going to take a trip to a very exciting
place and learn some new art techniques and project ideas while
you are there.

Here are a few French words you will need to know on your journey:

Bonjour or Salut means Hi, Hello or you can say Ca va "How's it going"
L'artiste is an artist, and there have been many great one's in France.
La peinture is a painting and that is something that we will create
on this "voyage".  Yes, you know lots of French words already.
There are a number of American cities founded by French explorers, like
Detroit, Michigan, Baton Rouge, Louisana, and St. Louis, Missouri that
have French names.

DID YOU KNOW?

That it was a French architect, Pierre L'Enfant who designed the layout
of Washington D.C. and that the wonderful Statue of Liberty was a gift
from the French people to the people of the United States.

SOME BACKGROUND INFORMATION ABOUT FRANCE

France is the largest country in Western Europe.  Its capital is Paris.
It has a long beautiful coastline with the Atlantic Ocean and Mediterrean
Sea.  It borders Spain, Switzerland, Italy, Germany, Luxembourg, and
Belgium, and is divided from Great Britian by the English Channel.

Politically, France is a Republic, the French flag is tricolor-blue,
red, and white and was first used in the French Revolution of l789.
The money currency is the French franc.   La Marseillaise, created
by a solider, is the French national anthem.  Bastille Day on July
14 is an important festival day celebrating this Revolution where masses
of ordinary French citizens stormed the Bastille prison in revolt.

French cooking, art, and fashion are recognized all over the world.
The Eiffel Tower is a landmark of Paris, France and is 1,000 ft.
high.  Another high and popular place in France are the French alps.
Mont Blanc is the highest mountain in the alps-it is 15,781 ft. high.

France is known for it's perfumes which use locally grown wild lavender, jasmine, violets,
orange blossom and more.  You can create your own perfume sachets using
recycling techniques in this fun project.
Art Project
Using a clean recycled plastic bottle decorate it and invent your own french perfume name.  Visit the Musee de Grasse Perfume Museum for inspiration.

Musee de Grasse Perfume Museum
http://www.museesdegrasse.com/MIP/fla_ang/mip_accueil_html.shtml
Make a Pointillist Painting using Q-tips and construction paper. Go back to last week's lecture and find the French painter George Seurat's "La Grande Jatte" and read about it.
Go to Next
Page